
Step 1: Create the Windows Server virtual machine
Perform the following steps to create a Windows virtual machine joined to the virtual network in which you've enabled Azure AD Domain Services.
1.Log in to the Azure portal at http://portal.azure.com.
2.Click the New button found on the upper left-hand corner of the Azure portal.
3.Select Compute, and then select Windows Server 2016 Datacenter.

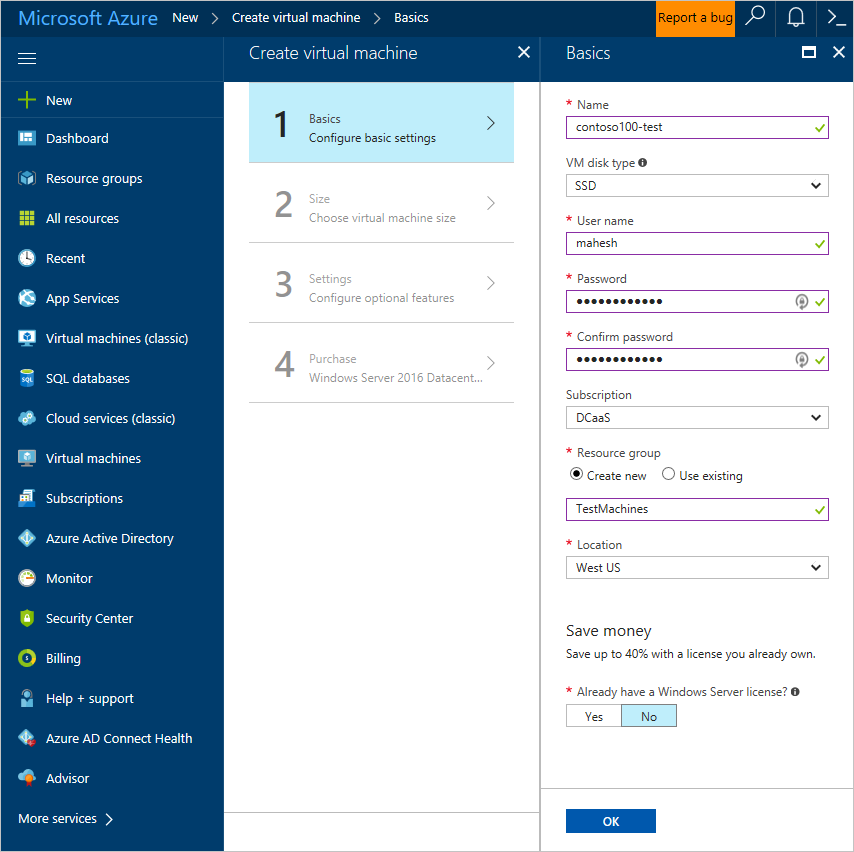
4. Configure the basic settings for the virtual machine on the Basics page of the wizard.
TIP
The user name and password you enter here are for a local administrator account used to log in to the virtual machine. Pick a strong password to protect the virtual machine against password brute-force attacks. Do not enter a domain user account's credentials here.
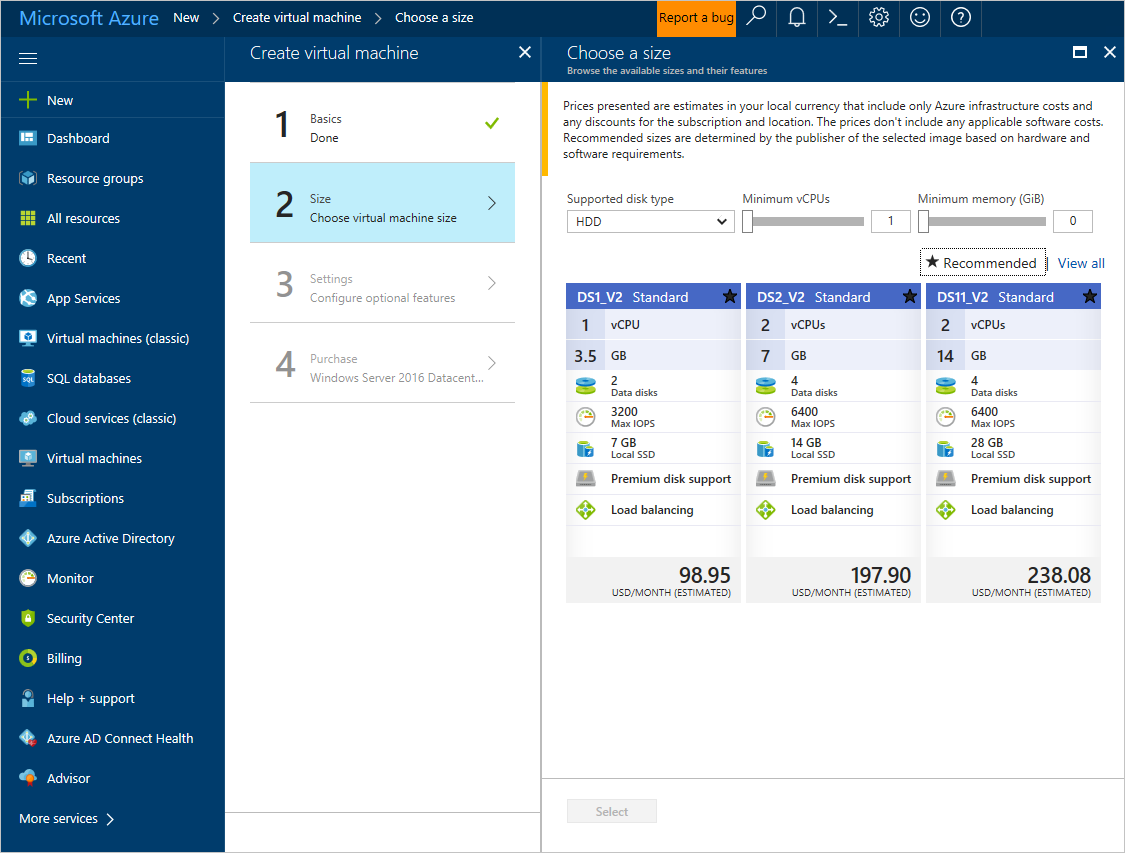
5.Select a Size for the virtual machine. To see more sizes, select View all or change the Supported disk type filter.
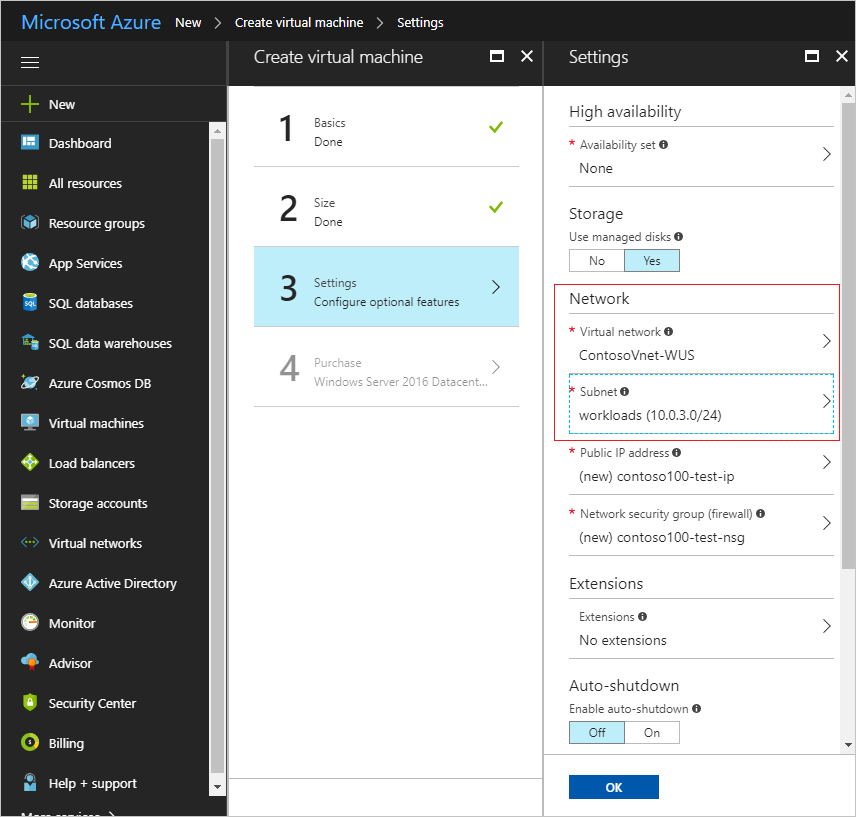
6.On the Settings page of the wizard, select the virtual network in which your Azure AD Domain Services managed domain is deployed. Pick a different subnet than the one your managed domain is deployed into. For the other settings, keep the defaults and click OK.
Tip
Pick the right virtual network and subnet. Select either the virtual network in which your managed domain is deployed or a virtual network that is connected to it using virtual network peering. If you select a different virtual network, you will not be able to join the virtual network to the managed domain. We recommend deploying your managed domain into a dedicated subnet. Therefore, do not pick the subnet in which you've enabled your managed domain.
7.On the Purchase page, review the settings and click OK to deploy the virtual machine.
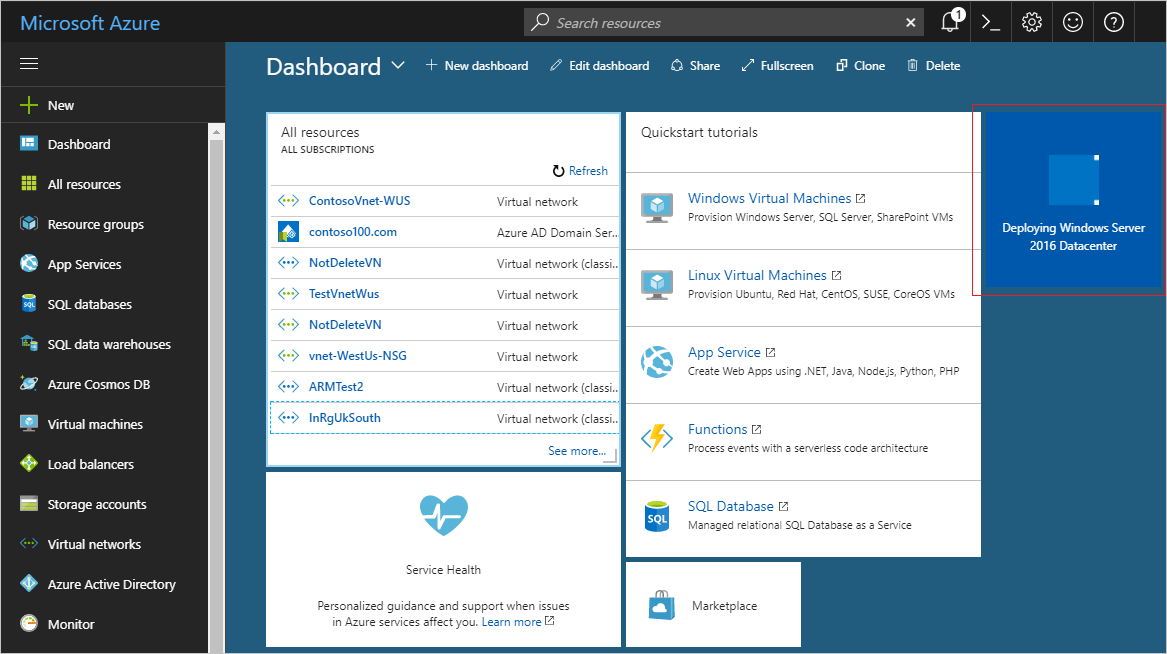
8.The VM deployment is pinned to the Azure portal dashboard.
Step 2: Connect to the Windows Server virtual machine using the local administrator account
Now, connect to the newly created Windows Server virtual machine, to join it to the domain. Use the local administrator credentials you specified when creating the virtual machine.
Perform the following steps to connect to the virtual machine.
1.Click the Connect button on the Overview page. A Remote Desktop Protocol (.rdp) file is created and downloaded.

2.To connect to your VM, open the downloaded RDP file. If prompted, click Connect.
3.At the login prompt, enter your local administrator credentials, which you specified while creating the virtual machine. For example, we've used 'localhost\mahesh' in this example.
4.You may receive a certificate warning during the sign-in process. Click Yes or Continue to proceed with the connection.
At this point, you should be logged in to the newly created Windows virtual machine using local Administrator credentials. The next step is to join the virtual machine to the domain.
Step 3: Join the Windows Server virtual machine to the AAD-DS managed domain
Perform the following steps to join the Windows Server virtual machine to the AAD-DS managed domain.
1.Connect to the Windows Server as shown in Step 2. From the Start screen, open Server Manager.
2.Click Local Server in the left pane of the Server Manager window.
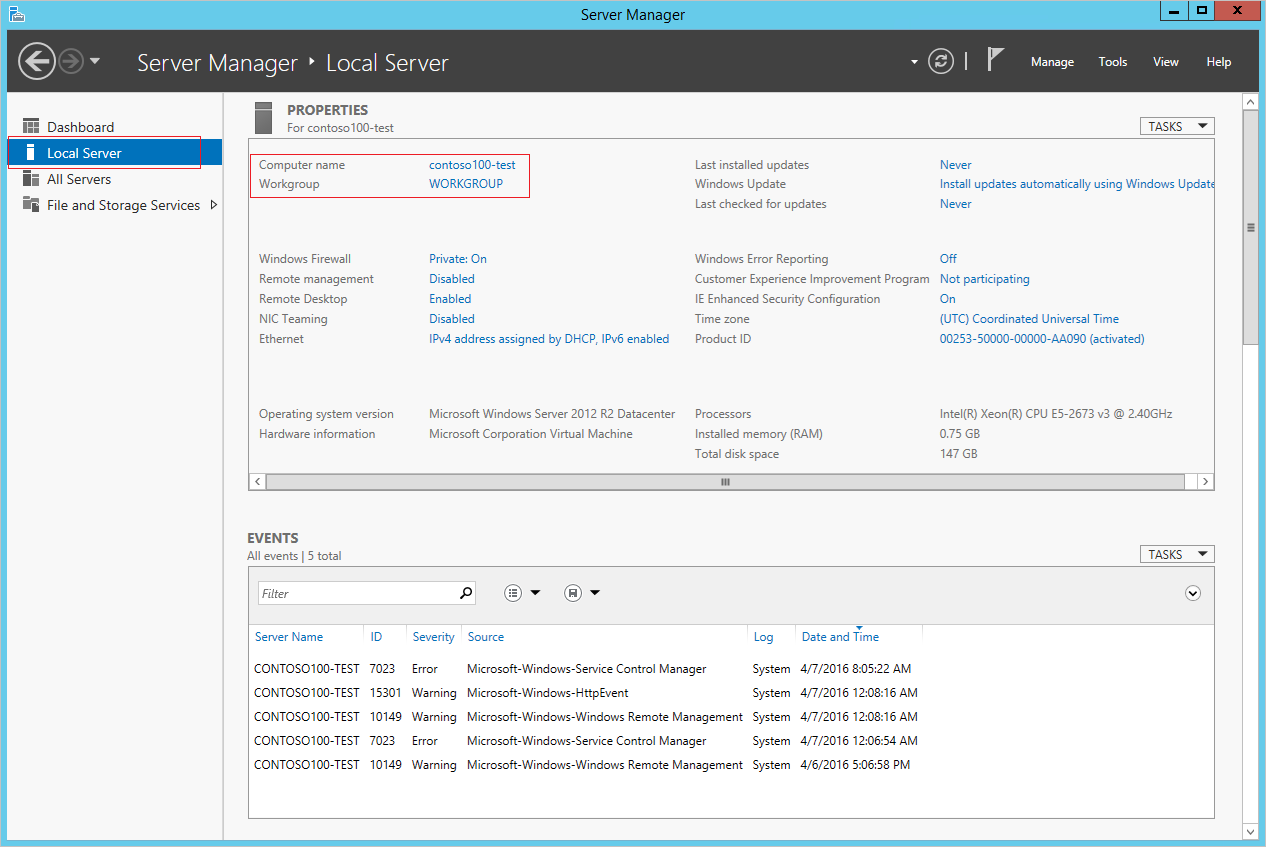
3.Click WORKGROUP under the PROPERTIES section. In the System Properties property page, click Change to join the domain.
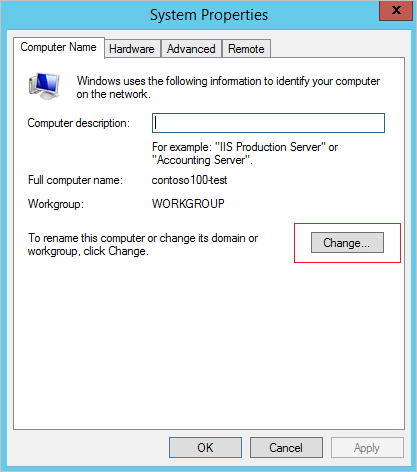
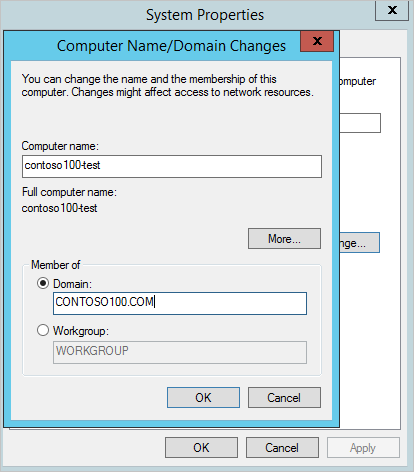
4.Specify the domain name of your Azure AD Domain Services managed domain in the Domain textbox and click OK.
5.You are prompted to enter your credentials to join the domain. Ensure that you specify the credentials for a user belonging to the AAD DC Administrators group. Only members of this group have privileges to join machines to the managed domain.
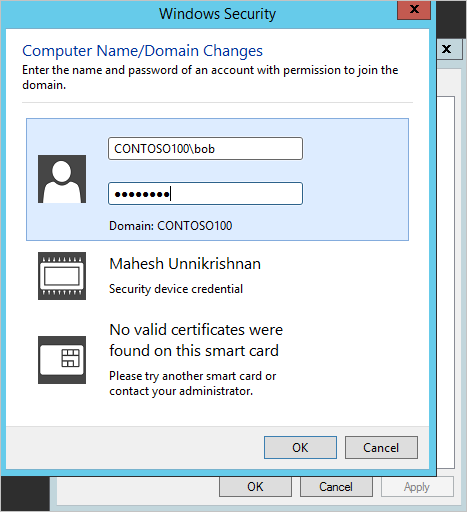
6.You can specify credentials in either of the following ways:
•UPN format: (recommended) Specify the UPN suffix for the user account, as configured in Azure AD. In this example, the UPN suffix of the user 'bob' is
'bob@domainservicespreview.onmicrosoft.com'.
SAMAccountName format: You can specify the account name in the SAMAccountName format. In this example, the user 'bob' would need to enter 'CONTOSO100\bob'.
Tip
We recommend using the UPN format to specify credentials. If a user's UPN prefix is overly long (for example, 'joehasareallylongname'), The SAMAccountName may be auto-generated. If multiple users have the same UPN prefix (for example, 'bob') in your Azure AD tenant, their SAMAccountName format may be auto-generated by the service. In these cases, the UPN format can be used reliably to log in to the domain.
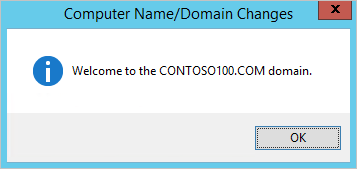
7.After domain join is successful, you see the following message welcoming you to the domain. Restart the virtual machine for the domain join operation to complete
Troubleshooting domain join
Connectivity issues
If the virtual machine is unable to find the domain, refer to the following troubleshooting steps:
•Ensure that the virtual machine is connected to the same virtual network as that you've enabled Domain Services in. If not, the virtual machine is unable to connect to the domain and therefore is unable to join the domain.
•Ensure the virtual machine is on a virtual network that is in turn connected to the virtual network in which you've enabled Domain Services.
•Try to ping the domain using the domain name of the managed domain (for example, 'ping contoso100.com'). If you're unable to do so, try to ping the IP addresses for the domain displayed on the page where you enabled Azure AD Domain Services (for example, 'ping 10.0.0.4'). If you're able to ping the IP address but not the domain, DNS may be incorrectly configured. Check if the IP addresses of the domain are configured as DNS servers for the virtual network.
•Try flushing the DNS resolver cache on the virtual machine ('ipconfig /flushdns').
If you get to the dialog box that asks for credentials to join the domain, you do not have connectivity issues.
Credentials-related issues
Refer to the following steps if you're having trouble with credentials and are unable to join the domain.
•Try using the UPN format to specify credentials. If there are multiple users with the same UPN prefix in your tenant or if your UPN prefix is overly long, the SAMAccountName for your account may be auto-generated. Therefore, the SAMAccountName format for your account may be different from what you expect or use in your on-premises domain.
•Try to use the credentials of a user account that belongs to the 'AAD DC Administrators' group to join machines to the managed domain.
•Ensure that you have enabled password synchronization in accordance with the steps outlined in the Getting Started guide.
•Ensure that you use the UPN of the user as configured in Azure AD (for example, 'bob@domainservicespreview.onmicrosoft.com') to sign in.
•Ensure that you have waited long enough for password synchronization to complete as specified in the Getting Started guide.


